Publishing your first app on the Apple App Store is a milestone that involves more steps and more potential rejection points than most developers anticipate when they begin the process. The App Store review system is more thorough than it has ever been in 2026, which means apps that meet the guidelines get approved relatively quickly, and apps that do not get rejected with specific feedback that must be addressed before resubmission. This guide walks through every step of the process to give you the best possible chance of a smooth first submission.
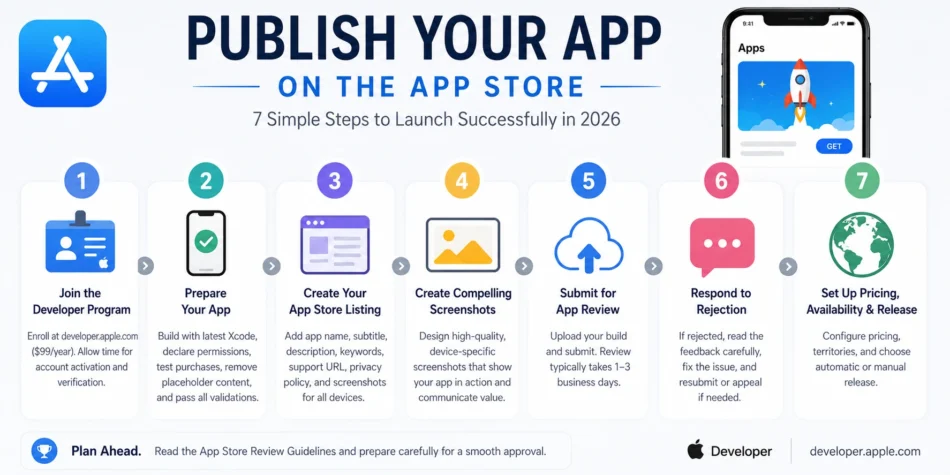
Step 1 – Join the Apple Developer Program
Before submitting any app, you need an Apple Developer Program membership. Individual accounts and organisation accounts both cost ninety-nine dollars per year. Organisation accounts require an Apple-verified D-U-N-S number for your company, which can take several business days to verify if your organisation does not already have one in the Apple Developer database.
Enrol at developer.apple.com and allow up to forty-eight hours for individual account activation. Organisation accounts can take several additional days for legal entity verification. Plan this step at least two weeks before your target submission date to avoid being blocked by account issues when your app is otherwise ready.
Enrol in the Apple Developer Program at developer.apple.com/programs/enroll.
Step 2 – Prepare Your App for Submission
Before creating your App Store Connect listing, your app must meet several technical requirements. The app must be built with the current Xcode version – in 2026, submissions using outdated Xcode versions are automatically rejected. The minimum iOS version your app supports should be current enough to reach most active device users while not being so restrictive that development is unnecessarily complex.
- All app capabilities used – push notifications, camera access, location services – must be declared in the Info.plist file with accurate usage description strings explaining why the permission is needed
- The app must not contain any placeholder content, test data, or template content visible to users
- All in-app purchases must be configured and tested through the sandbox environment before submission
- The app must pass all Xcode build validation checks without warnings about missing icons, deprecated APIs, or privacy manifest requirements
Step 3 – Create Your App Store Connect Listing
App Store Connect is Apple’s portal for managing your app submissions and listings. Create a new app record, select the platform, and enter the bundle identifier that matches your Xcode project exactly. The bundle identifier cannot be changed after the app is created in App Store Connect, so ensure it is correct before proceeding.
The App Store listing requires the following content for the initial submission:
- App name – maximum 30 characters, must not include competitor names or misleading functionality claims
- Subtitle – maximum 30 characters, appears below the name in search results
- App description – up to 4000 characters describing the app’s functionality clearly and honestly
- Keywords – up to 100 characters of comma-separated keywords for search discovery
- Support URL – a live web page where users can get help with your app
- Privacy Policy URL – mandatory for all apps regardless of whether personal data is collected
- Screenshots for every device size you support – iPhone, iPad if the app supports it, and Mac if applicable
Step 4 – Create Compelling Screenshots
App Store screenshots are the single most important visual element in your listing and have the largest impact on conversion from search result to download. Apple requires screenshots in specific pixel dimensions for each device size. Most developers create localised screenshots with device frames and text callouts rather than raw app screenshots.
Tools including Sketch, Figma, and Canva all have App Store screenshot templates. The most effective screenshots show the app in use with contextual UI rather than generic feature highlights. The first screenshot is the most critical – in search results, only the first one or three screenshots are visible before the user must tap to expand, so the first screenshot must communicate the app’s core value proposition immediately.
Step 5 – Submit for App Review
Once your listing content is complete and your app binary is uploaded through Xcode or Transporter, you can submit for review. App review in 2026 typically completes within one to three business days for straightforward apps without special entitlements or complex in-app purchase systems. Apps with subscription in-app purchases, apps using privacy-sensitive data, or apps in certain content categories may take longer.
During review, Apple’s team verifies that the app works as described, that all permissions are used as declared, that in-app purchases function correctly in the sandbox, and that the app complies with the App Store Review Guidelines. The most common rejection reasons include crashes during review, inaccurate app descriptions, missing privacy information, or functionality that does not work as described in the listing.
The App Store Review Guidelines are published in full at developer.apple.com/app-store/review/guidelines. Read these thoroughly before submission – most first-submission rejections cite guidelines that were available to read beforehand.
Step 6 – Respond to Rejection If It Happens
If your app is rejected, Apple provides specific feedback explaining which guideline was violated. Do not simply resubmit without addressing the issue – the app will be rejected again for the same reason. Respond through the Resolution Center in App Store Connect, either fixing the identified issue or appealing if you believe the rejection was in error.
Step 7 – Set Up Pricing, Availability, and Release
Once approved, configure your app’s price tier and the territories where it will be available before releasing. The App Store supports custom pricing across different territories rather than requiring uniform global pricing. For a free app with in-app purchases, the pricing section only requires configuring the in-app purchase prices rather than the app price itself.
You can choose automatic release upon approval or manual release where you control the exact timing of when the approved app becomes publicly available. Manual release is useful for coordinating the App Store launch with marketing activities, press coverage, or a specific date announcement.
Manage your app throughout its lifecycle through appstoreconnect.apple.com. For comprehensive documentation, visit developer.apple.com.
